Streaming your Meetup - Part 1: Basics and Projector
When we did Script’18 in January 2018, we borrowed an A/V equipment worth of 35.000 EUR to make sure we get kick-ass videos. A+ camera, an A/V mixer and a hard disc recording system that does editing on the fly. We wanted to go live with our recordings directly after the conference.
It turned out that some mysterious error never stored any video data, just audio. We were devastated.
Last summer I decided to take matter in our own hands. Understand which pieces we need to be able to edit, record and stream videos from all our conferences, meetups and all other events we might do. And I wanted to go from pro equipment to consumer class equipment. See how much quality we can get out of off the shelf pieces.
I want to share my findings with you. Maybe you get some ideas for your own meetup or conference. I go from super cheap to quite expensive in some cases. But I always refrain from pro equipment.
I split the whole series into four pieces:
- Basics and Projector – 📍you are here
- Recording the speaker
- Recording audio
- Directing and streaming with OBS
Enjoy!
Basics #
Before you start any stream with the possible combinations of hardware equipment, you need some basics.
A powerful laptop, a powerful graphics card #
I underestimated the need for a powerful laptop to be able to record with at least 30 frames per second. Slides usually go for 30 frames per talk, but if you want to have a video recording of your speaker that’s smooth and without any significant frame drops, make sure that you have a laptop with its own graphics card.
If you’re using a Mac, the 15" Macbook Pros have a proper graphics card. 13" Macbooks have onboard graphics. If your specs say something from NVIDIA to ATI you can be pretty sure.
Alternatives: Get an external graphics card (they exist) like the Razor Core X (Amazon) - around 300-500 EUR.
HDMI cables, a couple of them #
You need a couple of HDMI cables to record your stuff. Make sure you have a couple of them in different lengths to be prepared for your surroundings. It’s easier with a meetup as the room is usually much smaller and the layout is more casual. This means you can be directly in the first row and don’t need long HDMI cables.
For a conference, you sometimes need to layout 20m worth of HDMI cables. This is where HDMI has its limits. Starting from 7m, you get one-directional cables. Which means you need to make sure you have to take care where the ends are.
I usually have 2-3 HDMI cables around 1.5m, one cable around 3m, and a longer one that spans 10m.
- 1.8m bi-directonal (Amazon)
- 3m bi-directional (Amazon)
- 7.5m bi-directonal (Amazon)
- 10.5m one direction (Amazon)
You’ll spend around 50 EUR.
A network cable #
If you want to stream, I recommend using good old ethernet connections rather than WiFi. WiFi, even strong ones that have good upstream, have interferences, cause stalls, and don’t produce the same quality as going over the wire.
Ask your meetup host if they have a LAN connection. They also should open all ports to make sure the streaming servers are reachable.
I have a recent Macbook Pro, so I only have USB-C jacks. I bought a cheap adapter (that’s what Macbook users do) to have ethernet available:
Recording the projector #
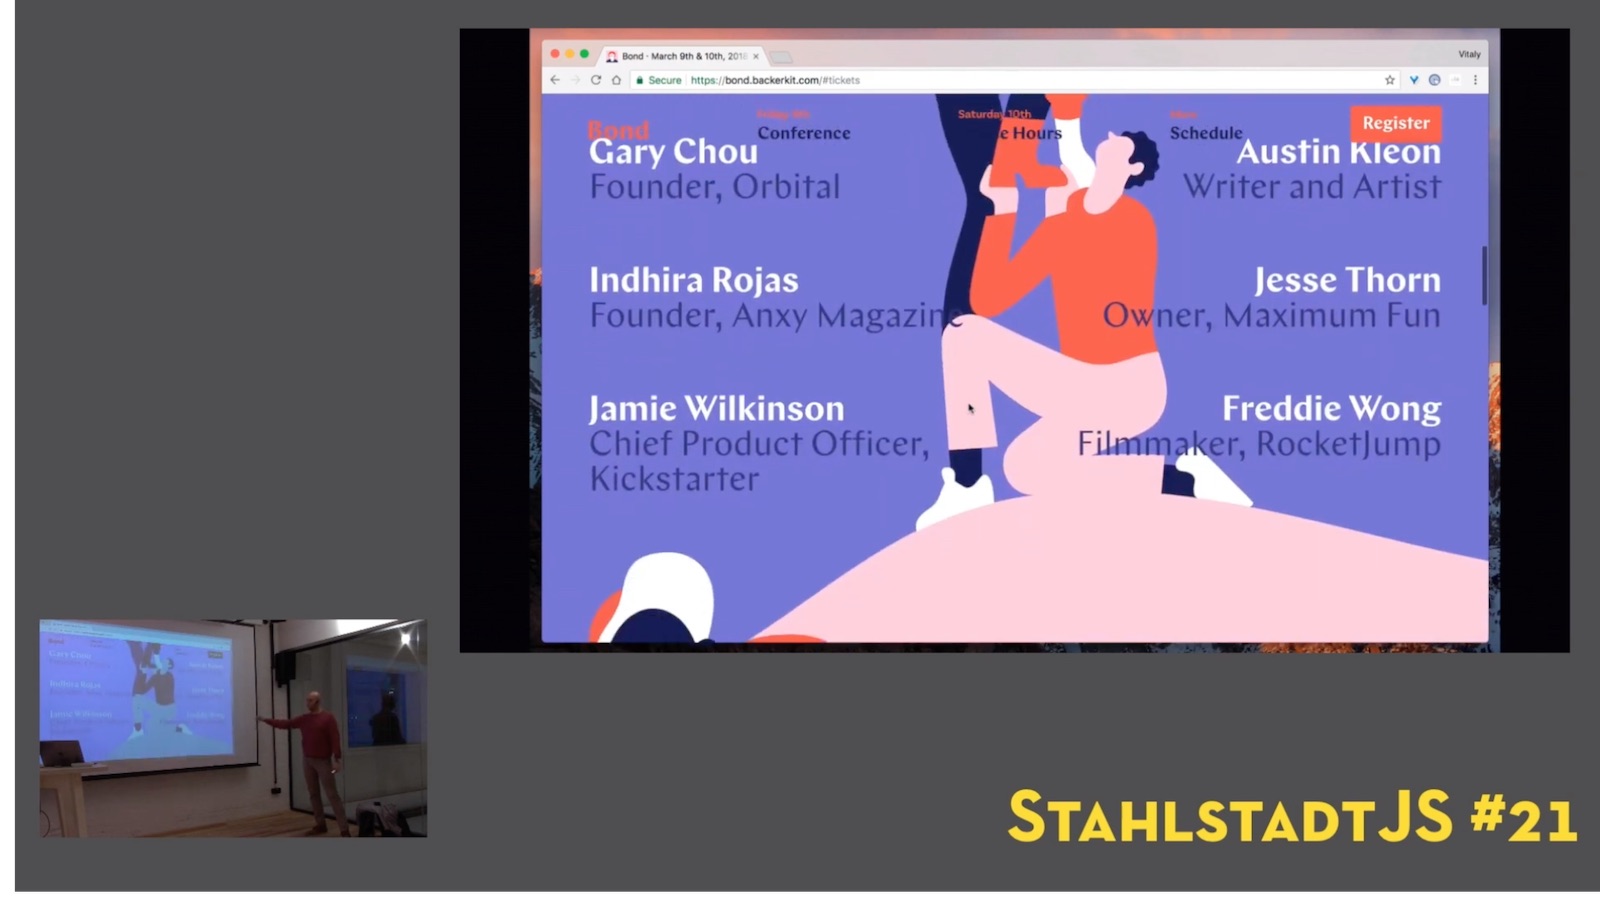
Our goal is to have a split screen view, like we know from conference videos, with this layout:

It contains
- Speaker audio
- Speaker video
- Projector video
- Projector audio
Let’s focus on the projector. We want to record the video output of our speaker’s laptop. We need this signal as an input for our laptop. Sounds hard! We can achieve this in two steps:
1. Splitting the signal #
We somehow need to make sure the speaker laptop video out not only goes to the projector, but also to us. For that we need to split the signal and lead it to both video input sinks.
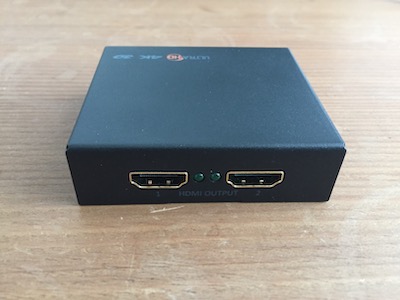
For that, I can highly recommend the CSL HDMI Splitter. Works like a charm, has external power supply to make sure that it can handle the signal. One input, two outputs, 20 EUR:

I usually take one of my 1.8m cables to connect the speaker laptop to the splitter in, take the projector cable to output 1, and use one of my 7.5m or 3m cables to connect it from output 2 to my laptop.
But wait! We can’t simply plug this one into our HDMI jack. Laptop’s HDMI plugs only produce a video out signal, no video in. For that we need another tool: A video grabbing device.
2. Grabbing the video signal #
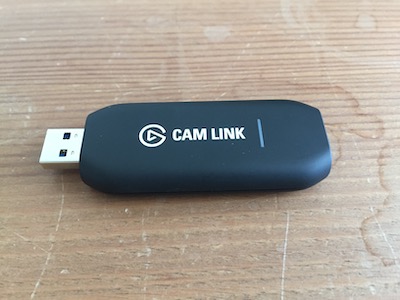
We need a special plug that transforms the video in signal into something our laptops can understand. We need to convert the signal into a … webcam! There’s a tool for that. Coming from the game streaming community called CamLink. It takes HDMI for input and has an USB connector so you can plug it into your laptop.

It’s pretty much plug and play. You can immediately use it as a webcam.
I recommend installing their Game Capture software. It’s not what we need to stream our meetup, but you are able to do some settings for the CamLink. Like recuding framerate, or resolution. It might help with some notebooks to get a signal without interferences.
Plug it in and try it out with your favourite Webcam software.
Money spent so far #
We want to keep it as affordable as it can be. Right now we spent:
- 50 EUR on HDMI cables
- 20 EUR for 4K HDMI Splitter (Amazon)
- 120 EUR for CamLink 4K (Amazon)
A total of 190 EUR to get started.
Cheap alternative if you don’t want to stream, just record #
This setup is convenient if you want to record and stream without any hassle. And without being constraint on the input signal: if it can produce HDMI, you can record it.
If you don’t want to stream, just record, and maybe have some time to assemble videos in post production, you can always ask one thing: Speakers shall record their own screen. On Mac this is possible via QuickTime. And I just found out Windows 10 has a built-in screen recorder as well.
Costs: 0. You have to do serious post production, though.
Coming up next: Recording the speaker!